We’ve all been there before – those repetitive tasks that usually involve heaps of copy & pasting. Maybe you’re a salesperson ardently following your sales process, and a part of that process is including a standard comment? Well, then – look no further, Quick Text is here to help.
Here’s how it works. You’re looking at a record. Let’s say you want to then create a Task based on the details of that record. Right now, I’m looking at an Opportunity for American Banking Corp. on my developer edition org, and I want to create a Task. So, I navigate to the Activity tab, and click on “New Task”.
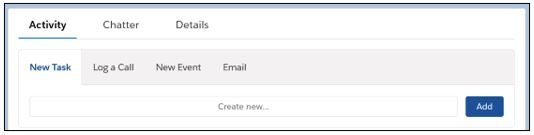
When I click on “Create new…”, I then see the Task creation screen that I’d expect to see. But I have Quick Text enabled, and I’ve already created some quick text. So, when I click into the Comments box on my Task, I see a little button on the right-hand side of the screen:
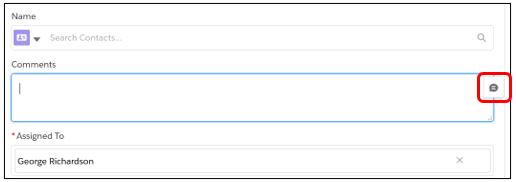
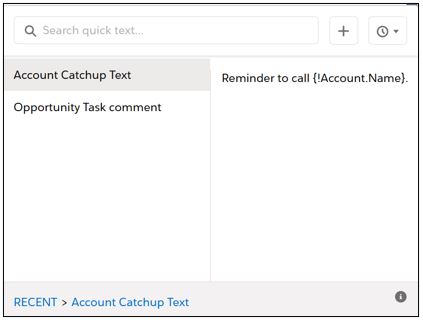
And when I click on this button, I can see the Quick Text that I’ve already created.
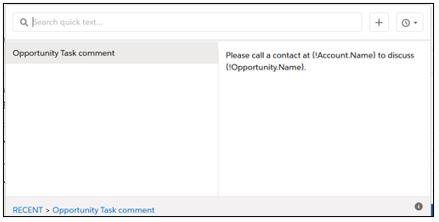
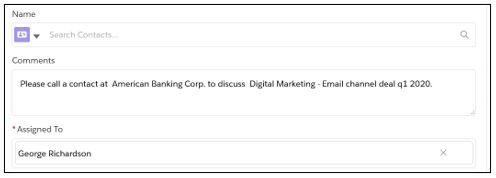
When I select the Quick Text that I’d like to use, Salesforce fills the information in from the merge fields you can see on the right hand side (such as {!Account.Name) with the details from the record. In this example, I end up with this:
We can use these Quick Texts in many places throughout Salesforce, such as:
- Emails
- Events
- Knowledge Articles
- Live Agent chat
- Phone calls
- Communities
- Social posts
- Tasks
With the above in mind, it’s clear to see how Quick Text can save you time across a great swathe of the Salesforce platform. For example – if you’re a service agent fielding repetitive requests via the live agent chat, or if you want to create Chatter posts based on information held in Salesforce. The limits of Quick Text are really only bound by your creativity.
So now that we know how to use Quick Text, let’s learn how we can configure it. If you’re already using the lightning experience – good news! Quick Text should already be turned on for you. If it isn’t, or it’s been turned off, you can navigate to “Quick Text Settings” in setup (User Interface > Quick Text Settings) and enable it with a button, like so:
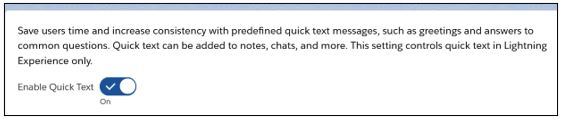
From this page, you can also decide to share the Quick Text you create in folders to make it easier for your users to access. Once you’ve enabled Quick Text, it will appear as a tab you can access via the App launcher (or in any App you decide to deploy it to in the same way you’d normally surface a tab). It looks like this:
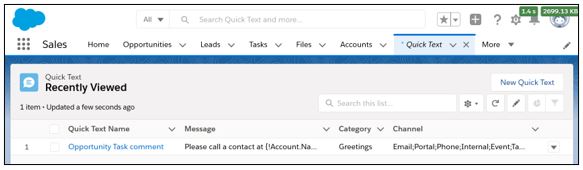
Here you can see the Quick Text I created for the demonstration earlier. To create your own, simply click on “New Quick Text” in the top right-hand corner. This will bring up the New Quick Text screen. Let’s start with the basics!
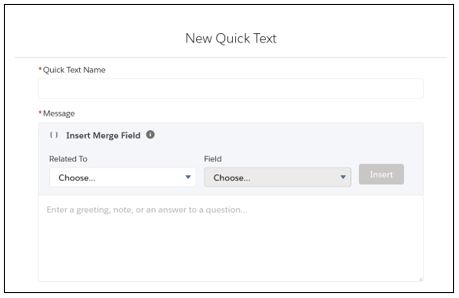
The first two things we need to do are to give our Quick Text a name – this will make it easy for the people using this text to identify which one they’re selecting, so make sure the name is clear. After this, we can then write our quick text in the box below it! To use the merge fields, simply select the object you want to draw the information from on the left and select the field you want on the right, like so:
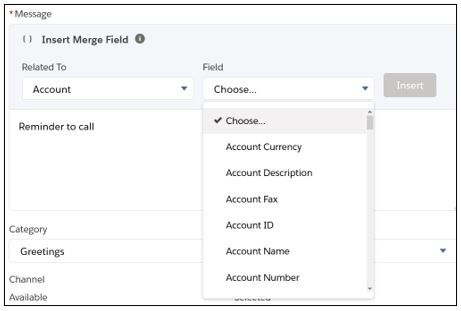
I’ve ended up with “Reminder to call {!Account.Name}.” It’s a very basic example of what we can do – try to think about where your users might be writing repetitive text quite often. Once you’ve written the text, you then need to choose where you want to store it (if you’re using folders!) and where you want to make the Quick Text available, from Email, to Knowledge Articles, Tasks, or Events. Once you’re done, hit Save and we can go test this out.
Just like before, I’m going to create a new Task. When I click on the button this time, I can see my new Quick Text ready to go:
From this window, you can even click on the plus icon at the top of the screen to create new Quick Text! You can also access the Quick Text window with the keyboard shortcut “ctrl .” – that’s control and the period button pressed at the same time.