If scheduling appointments is a consistent problem in your business, or you need to upscale your current system, try the Salesforce Lightning Scheduler. This add-on could be a great tool if your business is growing, and you need an appointment scheduler with the advanced features to make your life easier.
The Lightning Scheduler is a feature everyone can benefit from, especially in a post-pandemic world. The new normal has forced businesses to adapt and this tool can rise to the challenge of meeting your busy scheduling needs.
Honestly, scheduling appointments isn’t the most efficient use of your time. The Salesforce Lightning Scheduler puts the ability to book appointments directly in the hands of your customers. In this blog, we’ll be discussing Salesforce Lightning Scheduler and how it can enhance your current Salesforce use, as well as give an overview of the features and benefits.
What is Salesforce Lightning Scheduler?
Salesforce Lightning Scheduler helps you schedule all your meetings quickly and easily. It can set up appointments with Leads and Opportunities in a way that is consistent across your business. Salesforce Lightning Scheduler supports your customers in scheduling appointments at the right location with the correct person at a time that suits everyone.
Customers can choose a phone call, video call, or in-person meeting with the most appropriate member of your team. Your customers can book based on factors like opening hours, resource capacity, and room availability. Overall, its purpose is to help assign your resources more efficiently, so you can better serve your customers.
What are the key features?
- Customers can book appointments directly on your website
- Manage virtual or in-person appointments from anywhere
- Embed appointments into standard Salesforce workflows
- Grant the right permissions to the right employees
- Easy to edit and cancel appointments
- Empower your customers to schedule appointments across a variety of different channels
- Set up territories
- Leverage all your customer information already stored in Salesforce
- Add all the information you need into the appointment notes, so everyone is prepared
- Automated tasks provide a seamless experience, enabling employees to provide more consistent customer service
- Capture valuable feedback
Who is it for?
Salesforce Lightning Scheduler is designed to work with a variety of business types. It is designed to be a time-effective product with comprehensive scheduling capabilities. It is available as an add-on product with Enterprise, Performance, and Unlimited editions of Salesforce. The add-on does have some limitations, and it does take time to set up, but our team will be happy to support you. If you have more complex requirements, Salesforce Field Service offers more advanced features and customisable options.
Getting Started
Depending on how complex your appointment system is, there are a few steps and options when configuring with scheduler, but these steps are a good guide to get you started. There is a built-in assistant to help get you started too.
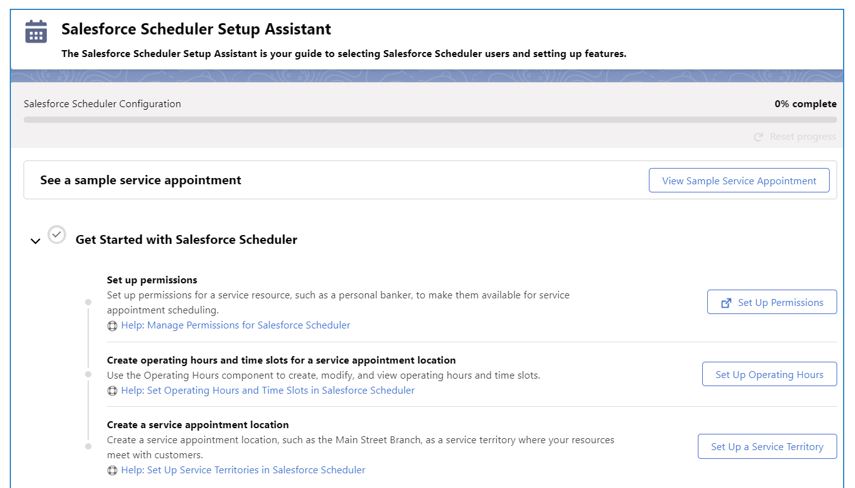
Let’s start with Permissions
- First, as the System Administrator, assign the Scheduler app to the System Administrator profile, you can do this from the App Manager and select user profiles.
- Create a permission set that includes the Let a user be included in appointments in Salesforce Scheduler permission and assign it to your users.
- You will need to update the profiles that will be using the scheduler, your options are:
- Create on Service Appointments
- View All on:
- Service Resources
- Work Type Groups
- Work Types
- Service Territories
- Edit on Service Territories
- View All on Service Resources
- View All and Create on Work Types
- View All on Work Type Groups
- Create and Edit on Operating Hours
- View All, Create, and Edit on Resource Absence
- Create and Edit on Resource Absences
Create Appointment Locations, Attendees and Skills
Depending on how you would like to set up the appointments you can customise these options via the set-up menu:
- Locations are where the appointments are taking place, in a branch or online for example, you can define these creating Service Territories
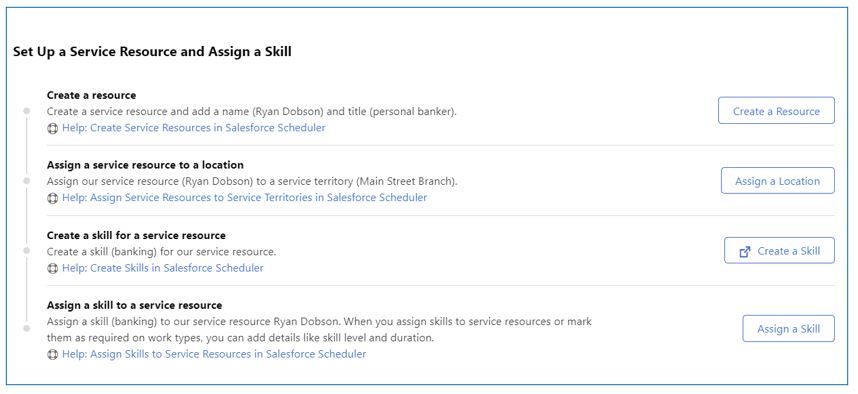
- Attendees are the people from your organisation attending the meeting. These are called Service Resources, just click the Service resource tab to get these set up and you can list their Skills in there to ensure they are matched with the right appointment.
Add the Appointment Button
Finally remember to add the appointment button to the Account page.
- From Setup, open Object Manager.
- Click the Account object and open the Page Layout
- From the palette, select Mobile & Lightning Actions.
- Drag Schedule Appointment to Salesforce Mobile and Lightning Experience Actions.
- Click Save.
- If needed repeat these steps to add to the Lead, and Opportunity page layouts.

We are a registered Salesforce consulting partner, so if you need additional support getting started with the Lightning Scheduler or want to learn more about Salesforce, please get in touch with our team via our contact us page, or give us a call on 01793 915150.